Banner
Banner
Banner
Is OnePlus 7 eSIM Compatible? - How to Activate eSIM on OnePlus 7 Phone Models
In today's connected world, staying online while traveling or managing multiple phone numbers has never been more important. The OnePlus 7 series, released in 2019, remains a popular choice for many smartphone users. But if you're wondering about OnePlus 7 eSIM compatibility or how to activate eSIM on your OnePlus 7 Pro, 7T, or 7T Pro, you've come to the right place. This comprehensive guide will walk you through everything you need to know about eSIM support for OnePlus 7 models, including workarounds for devices that don't have native support. Whether you're looking to use dual SIM functionality or simply want to understand your options, we'll cover all the essential details. What is eSIM? An eSIM (embedded SIM) is a digital SIM card that's built directly into your smartphone's hardware. Unlike traditional physical SIM cards, eSIMs don't require you to insert a removable chip into your device. Instead, you can download and activate carrier profiles digitally, making it incredibly convenient for travelers, business users, or anyone who needs multiple phone numbers. The eSIM technology offers several compelling benefits, which includes - but not limited to - the following: Instant activation: No need to wait for physical SIM cards to arrive Multiple profiles: Store several carrier profiles simultaneously Travel convenience: Easily switch between local carriers when abroad Space saving: Allows manufacturers to design slimmer devices Enhanced security: Harder to remove or tamper with compared to physical SIMs Environmental benefits: Reduces plastic waste from SIM card production Is OnePlus 7 eSIM Compatible? The OnePlus 7 series includes four main variants, each with distinct specifications but unfortunately limited eSIM support: Model Native eSIM Support Workaround Available RAM Options Storage Options OnePlus 7 No Yes (3rd party) 6GB/8GB 128GB/256GB OnePlus 7 Pro No Yes (3rd party) 6GB/8GB/12GB 128GB/256GB OnePlus 7T No Yes (3rd party) 8GB 128GB/256GB OnePlus 7T Pro No Yes (3rd party) 8GB/12GB 256GB Important Note: None of the OnePlus 7 series devices have native eSIM compatibility. OnePlus only introduced native eSIM support starting with the OnePlus 11 in 2023. However, there are workarounds to getting eSIM functionality on OnePlus 7 models - #Keep_Reading. How to Verify if a OnePlus Device Supports eSIM If you're unsure about your device's eSIM capabilities, here are three reliable methods to check: Settings Path: Navigate to Settings → Network & Internet → SIM & Network and look for an "Add eSIM" option Dial Code Method: Enter *#06# on your phone's dialer. If you see an EID (Embedded SIM ID), your device has eSIM hardware support Manufacturer Confirmation: Contact OnePlus support or your network carrier for definitive confirmation about your specific model and region What You Need Before Activating eSIM Before attempting to activate eSIM functionality on your OnePlus 7 series device, ensure you have the following requirements: Essential Requirements Unlocked Device: Your OnePlus 7 must be carrier-unlocked. Locked devices may not support third-party eSIM solutions or carrier switching. Active Internet Connection: A stable Wi-Fi or cellular connection is crucial for downloading eSIM profiles and completing activation. Updated Operating System: Ensure your OnePlus 7 is running the latest available OxygenOS version for optimal compatibility with third-party eSIM solutions. eSIM QR Code or Activation Details: Obtain these from your chosen eSIM provider. This typically includes a QR code to scan or manual activation codes. Third-Party eSIM Card: Since OnePlus 7 models lack native support, you'll need a physical adapter card from services like eSIM.me. Additional Considerations Backup Current Settings: Create a backup of your current network settings before making changes Carrier Compatibility: Verify that your intended eSIM provider supports your OnePlus 7 model Dual SIM Slot: Ensure one SIM slot is available for the third-party eSIM adapter How to Activate eSIM on OnePlus 7 Models The OnePlus 7, 7 Pro, 7T, and 7T Pro do not have native eSIM compatibility. This means you cannot directly add eSIM profiles through the device settings like you would on newer OnePlus models (11, 12, and 13) or other eSIM-capable smartphones. To enable eSIM functionality on your OnePlus 7 series device, you'll need to use third-party services that provide physical eSIM adapter cards. Step-by-Step Activation Guide Step 1: Purchase a Third-Party eSIM Adapter Order an eSIM.me card or similar adapter from a reputable provider These cards physically fit into your SIM slot but allow digital eSIM profile management Step 2: Install the Required App Download the companion app (usually provided by the eSIM adapter manufacturer) Create an account and verify your identity as required Step 3: Insert the eSIM Adapter Power off your OnePlus 7 device Remove your existing SIM card tray Insert the eSIM adapter card into the SIM slot Restart your device Step 4: Configure the eSIM Profile Open the companion app Scan the QR code provided by your eSIM carrier Follow the on-screen instructions to download and activate the profile Step 5: Test Connectivity Verify that cellular connectivity is working Test both data and voice services if applicable Configure network settings as needed Best eSIM Service Providers for OnePlus 7 in US, UK, Canada, and Australia United States eSIM Service Providers Major Carriers with eSIM Support: T-Mobile: Offers comprehensive eSIM plans with 5G coverage Verizon: Premium network with extensive rural coverage AT&T: Wide network reach with competitive pricing Popular Online eSIM Providers: Airalo: Global coverage with competitive rates for travelers Holafly: Unlimited data plans for international use Ubigi: Independent MVNO with 5G support and data tethering United Kingdom eSIM Service Providers Native UK Carriers: EE: Leading 5G network with excellent coverage O2: Reliable network with flexible plan options Vodafone: International roaming-friendly plans Three: Competitive pricing with good data allowances Specialized eSIM Services: eSIM.Net: UK-based provider with £20 monthly rolling plans GiffGaff: Budget-friendly option with community support Canada eSIM Service Providers Major Canadian Networks: Rogers: Extensive coverage across Canada Bell: Premium network with 5G availability Telus: Reliable service with good rural coverage International eSIM Options: Maya Mobile: Affordable plans with extended validity periods Travel eSIM providers: Various options for short-term visits Australia eSIM Service Providers Primary Australian Carriers: Telstra: Most comprehensive coverage including remote areas Optus: Strong urban coverage with competitive pricing Vodafone Australia: Good value plans with international inclusions Travel-Focused Providers: Various international eSIM services: Suitable for visitors and travelers OnePlus 7 eSIM vs. Physical SIM - Which Should You Use? The OnePlus 7 series supports Dual SIM Dual Standby (DSDS), allowing you to use two SIM cards simultaneously. When using a third-party eSIM adapter, you can potentially run both an eSIM profile and a physical SIM, though this depends on your specific adapter and configuration. Advantages of Using eSIM on OnePlus 7 Convenience Benefits: Instant carrier switching without physical SIM swaps Multiple profiles stored on a single adapter Reduced risk of losing or damaging physical SIM cards Easier international travel with local carrier options Business and Personal Use: Separate business and personal numbers on one device Cost-effective international roaming alternatives Simplified carrier plan comparisons and switching Physical SIM Advantages Reliability and Compatibility: Universal compatibility across all carriers No dependence on third-party adapters or apps Immediate full-speed connectivity without setup delays Lower complexity and potential troubleshooting issues When to Choose eSIM vs Physical SIM Choose eSIM When: Traveling frequently and need local carrier options Managing multiple phone numbers for business/personal use Your primary carrier offers better eSIM rates You prefer digital convenience over physical cards Choose Physical SIM When: You need maximum reliability and simplicity Your carrier doesn't support eSIM on third-party adapters You're in an area with limited technical support You prefer traditional SIM management methods Pros and Cons Comparison eSIM Pros: Digital convenience and instant activation Multiple carrier profiles on one device Space-saving design advantages Enhanced security features eSIM Cons: Requires third-party adapter for OnePlus 7 Potential compatibility issues Additional setup complexity Dependence on app-based management Physical SIM Pros: Universal compatibility and reliability Simple, well-established technology Direct carrier support No additional apps or adapters required Physical SIM Cons: Risk of physical loss or damage Slower carrier switching process Limited to one carrier per SIM slot Environmental impact of plastic cards Troubleshooting Common OnePlus 7 eSIM Issues Issue 1: eSIM Not Activating Possible Causes and Solutions: Issue: eSIM profile fails to download or activate Solutions: Verify internet connectivity (try both Wi-Fi and cellular) Restart your OnePlus 7 device and retry activation Ensure the third-party eSIM adapter is properly seated in the SIM slot Check if your device is carrier-unlocked Contact your eSIM provider to verify the QR code or activation details are correct Issue 2: eSIM Option Not Visible in Settings Issue: Cannot find eSIM settings in device menu Solutions: Remember that OnePlus 7 series requires third-party apps, not native settings Install the correct companion app for your eSIM adapter Update your OxygenOS to the latest available version Verify the eSIM adapter is compatible with your specific OnePlus 7 model Issue 3: Poor Signal or Connectivity Issues Issue: Weak signal or intermittent connectivity with eSIM Solutions: Check carrier coverage in your area Manually select network operators in Settings → Network & Internet → Mobile Network Reset network settings and reconfigure eSIM profile Try different APN settings provided by your carrier Contact carrier support for specific network configuration guidance Issue 4: Dual SIM Conflicts Issue: Problems when using both eSIM and physical SIM simultaneously Solutions: Set clear preferences for data, calls, and SMS in dual SIM settings Ensure both carriers support your device model Check for carrier-specific restrictions on dual SIM usage Consider using only one SIM at a time if conflicts persist Issue 5: App-Related Issues Issue: Third-party eSIM management app crashes or malfunctions Solutions: Force close and restart the eSIM management app Clear app cache and data, then reconfigure Update the app to the latest version Uninstall and reinstall the app if problems persist Check for device compatibility updates from the eSIM adapter provider Frequently Asked Questions Does OnePlus 7 support eSIM natively? No, the OnePlus 7, 7 Pro, 7T, and 7T Pro do not have native eSIM support. OnePlus introduced native eSIM functionality starting with the OnePlus 11. However, you can add eSIM capabilities using third-party adapter solutions. Can I use eSIM and physical SIM together on OnePlus 7? Yes, with a third-party eSIM adapter, you can potentially use both eSIM and physical SIM simultaneously, taking advantage of the OnePlus 7's Dual SIM Dual Standby (DSDS) capability. However, compatibility depends on your specific adapter and carrier requirements. Which OnePlus 7 variant has the best eSIM compatibility? All OnePlus 7 series models (7, 7 Pro, 7T, 7T Pro) have the same level of eSIM compatibility since none have native support. Third-party solutions work equally well across all variants, though success may vary depending on your specific carrier and region. How much does it cost to add eSIM to OnePlus 7? Third-party eSIM adapters typically cost between $20-50, plus the cost of your chosen eSIM plan from carriers or online providers. Monthly eSIM plans range from $10-50+ depending on data allowances and geographic coverage. Is using third-party eSIM safe on OnePlus 7? Reputable third-party eSIM providers like eSIM.me generally offer safe solutions. However, always research providers thoroughly, read reviews, and ensure they have proper security certifications before sharing personal information or payment details. Can I remove the eSIM adapter and go back to regular SIM? Yes, eSIM adapters are reversible. You can remove the adapter and return to using traditional physical SIM cards at any time. Your device functionality will return to its original state. Do all carriers support third-party eSIM on OnePlus 7? Not all carriers support third-party eSIM solutions. Contact your preferred carrier to confirm compatibility before purchasing an eSIM adapter. Major carriers in the US, UK, Canada, and Australia generally offer some level of support. What happens if I lose my phone with a third-party eSIM? Similar to losing a phone with a physical SIM, you'll need to contact your carrier to suspend service and potentially transfer your number to a new device. The advantage is that eSIM profiles can often be reinstalled remotely without needing a new physical card. Conclusion The OnePlus 7 series, while lacking native eSIM support, can still benefit from eSIM technology through third-party adapter solutions. Whether you own a OnePlus 7, 7 Pro, 7T, or 7T Pro, you have options for accessing the convenience and flexibility that eSIM technology offers. While these workarounds require additional hardware and setup steps compared to phones with native eSIM support, they provide a viable path for users who want to experience digital SIM benefits without upgrading their device. The key is choosing reputable providers, ensuring carrier compatibility, and understanding the limitations and requirements involved. For travelers, business users, or anyone interested in managing multiple phone numbers efficiently, third-party eSIM solutions can transform your OnePlus 7 into a more versatile communication device. As eSIM technology continues to evolve and become more widespread, these solutions will likely become even more refined and accessible. Remember to research providers thoroughly, verify compatibility with your specific model and region, and always have a backup connectivity plan when relying on newer technologies. Found this guide helpful? Share it with other OnePlus 7 users who might benefit from learning about eSIM options, and let us know in the comments about your experience with third-party eSIM solutions! References and Sources TechRadar - Best eSIMs for International Travel 2025 TechRadar - Best eSIMs for USA in 2025 Wise - Best eSIM for USA Travel (UK Guide 2025) Uswitch - Travel eSIM Deals 2025 Apple Support - eSIM Service Providers Fiberborne - OnePlus 13 eSIM Activation Guide XDA Forums - OnePlus eSIM Retrofit Discussion eSIM.me - OnePlus Device Support TurkSIM - OnePlus eSIM Compatibility List Holafly - eSIM Compatible Phones List Airalo Help Center - eSIM Device Support GigSky - eSIM Compatible Devices Guide

Admin

217 Views

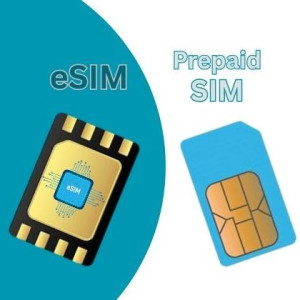
Physical Prepaid Sim Vs eSIM: Travelers Guide and Comparison
Travelers to the USA, UK, Canada, and Australia today have more choices than ever for staying connected. Local carriers offer prepaid SIM plans with generous data allowances, and a growing number of eSIM and travel SIM providers offer global data packages that avoid the hassle of airport lines. This guide compares both the major local telecom operators and the popular eSIM/travel SIM services in each country, with up-to-date plan details for 2025. We focus on practical information for tourists: plan features, coverage considerations, and real-world pricing in local currency (USD, GBP, CAD, AUD). The goal is to help you decide whether to grab a local prepaid SIM in-country or purchase an eSIM/travel SIM before your trip. United States: Major Carriers and Travel eSIMs In the US, the three big networks – AT&T, Verizon, and T-Mobile – each offer prepaid plans with various data tiers. All now support 5G, and even short-term tourists can buy prepaid plans (or eSIMs) without a contract or credit check. AT&T Prepaid: AT&T’s prepaid lineup is simple. For example, AT&T offers a 30 USD plan with 5 GB of 5G/4G data. Unlimited data plans start at 40 USD/month (with 30 GB of full-speed data, then slower speeds) and go up to 55 USD/month for truly unlimited data. These plans include unlimited talk/text and allow hotspot use (at reduced speeds after a cap). An especially cheap option is a 12-month pre-paid plan that effectively brings unlimited data down to 25 USD/month if paid upfront – though that requires committing to a year. Verizon Prepaid: Verizon’s prepaid plans are also straightforward. A 15 GB plan costs 35 USD/month. Unlimited plans run 50 USD (with 5 GB hotspot) up to 60 USD for the top Unlimited Plus plan. For example, Verizon’s Unlimited Plus Prepaid gives 50 GB of high-speed data plus 25 GB of hotspot data for 60 USD. (Taxes/fees extra.) The trade‐off is that prepaid data can be deprioritized during congestion, so peak speeds may slow after heavy usage. T-Mobile Prepaid: T-Mobile’s new 2025 prepaid offerings include a Starter plan with 15 GB for 40 USD with AutoPay (first month 45 USD) and an Unlimited Monthly plan (unlimited 5G data) for 45 USD with AutoPay (first month 50 USD). The premium Unlimited Plus plan costs 60 USD with AutoPay (65 USD first month) and adds up to 5 GB hotspot plus free texting to/from the US when roaming in Mexico/Canada. T-Mobile’s plans also come with perks (T-Mobile Tuesdays rewards, etc.) and a 5-year price guarantee on the base rate – a novel feature not offered by the other carriers. For a short trip, T-Mobile’s 45 USD plan (50 GB premium data) or Verizon’s 50 USD plan (unlimited data, 5 GB hotspot) are budget-friendly unlimited options. AT&T’s 30 USD plan is best for light users (5 GB data). In all cases, adding AutoPay yields the listed prices; without AutoPay, expect +5 USD. All three carriers offer eSIMs for their prepaid plans, so you can often buy and activate a plan online or at the airport without a physical SIM card. Travel SIM/eSIM options: Many travelers prefer an eSIM or travel SIM to avoid buying a local SIM on arrival. Global eSIM providers like Airalo, Ubigi, and Nomad let you purchase a US data plan from home. For example, Airalo and Nomad sell US-only eSIM bundles (e.g. ~10 GB for ~$30). Tech reviews note that providers like Jetpac even offer super-cheap deals – e.g. new users can get 1 GB for just $1 (valid 4 days). On the higher end, companies like Holafly focus on unlimited data passes (at higher prices). Physical travel SIMs (e.g. from companies like SimOptions or OneSimCard) also exist but are less popular now that most new phones support eSIM. In short, for a quick trip the local prepaid SIM is cheaper per GB, but for convenience or multi-country travel an eSIM plan can be worth it. (Note: US eSIM plans usually provide data only; voice calls go over Wi-Fi apps.) United Kingdom: Local SIM Deals and eSIMs In the UK, the main networks for prepaid (“pay-as-you-go”) SIM cards are EE, Vodafone, O2, and Three (Virgin Mobile is also available, using the EE network). Each offers a range of data bundles valid for 30 days. UK plan pricing is quoted in pounds sterling (£). Vodafone UK: Vodafone’s pay-as-you-go plans include, for example, 7 GB for £10, 20 GB for £15, 40 GB for £20, and 100 GB for £30. If you need it, Vodafone also offers unlimited data with unlimited calls/sms for £40. (All plans include unlimited UK calls/texts.) Vodafone no longer includes free EU roaming on PAYG, so Europe travel will incur extra fees (Vodafone added £2/day Roam Data as of 2021). O2 UK: O2’s prepaid bundles are similar. The entry plan is 8 GB for £10, then 25 GB for £15, 40 GB for £20, or 125 GB for £30. O2 does include some free EU roaming (up to 25 GB/month) on its pay-as-you-go bundles, which can be handy if you plan to continue on to Europe. EE (BT) UK: EE’s prepaid plans match those of Vodafone: 20 GB for £10, 50 GB for £15, 100 GB for £20, and 125 GB for £30. (EE’s £20 plan gives you 100 GB, per the list.) A noteworthy quirk: EE does not allow prepaid SIMs to access its 5G network, so speeds cap at 4G LTE (max ~25 Mbps) even if you pay for more data. Also, like Vodafone, EE doesn’t include free EU roaming on PAYG anymore. Three UK: Three’s prepaid plans are a bit pricier for the data. For 2025 they offer 4 GB for £19, 12 GB for £22, 25 GB for £24, and unlimited data for £31. Unlimited on Three can be attractive, and Three still includes free roaming in many destinations – not just Europe but also countries like Australia, Brazil, and the US (with some caps). However, note that Three also throttles data during congestion. Virgin/GiffGaff/Lebara (MVNOs): Virgin Mobile UK (on EE) and GiffGaff (on O2) have their own bundles. For example, GiffGaff sells 150 GB for £35. Lebara’s PAYG plans start very cheap (£5 for 5 GB) but have limited EU roaming. These MVNOs can be decent for local use, but we focus here on the main networks. Map: Three UK’s 4G/5G coverage is generally strong, especially in cities and major highways, making it a solid choice for travelers in the UK. eSIM/Travel SIM in the UK: Tourists often simply buy one of the above pay-as-you-go SIMs at Heathrow or in town. But eSIM options are growing: Airalo, Nomad, Ubigi and others sell UK eSIM data packs (for example, Airalo’s UK plan might be a few pounds per GB). Compared to a local SIM, eSIMs often include EU roaming at no extra cost, which local SIMs lack post-Brexit. One downside: most global eSIMs are data-only (no UK phone number), but they avoid airport SIM queues. In practice, the price differences are small. Local 30-day SIM bundles (e.g. ~£30 for 100 GB) are about the same cost as many eSIM plans for the same data. Canada: Local SIM Plans vs eSIM Solutions Canada’s big carriers – Bell, Rogers, Telus – each sell prepaid SIM cards, but coverage-wise they all rely on the same towers (Bell and Telus share one network, Rogers is another). Notably, prepaid SIMs in Canada do not include 5G (only 4G/LTE), unlike postpaid plans. Data plans tend to be limited in size and relatively expensive, according to a Canada travel guide. All pricing here is in Canadian dollars (CAD$). Telus (and Koodo): Telus prepaid plans (as of April 2025) are 1 GB for C$35, 5 GB for C$45, or 10 GB for C$55, all valid 30 days. Telus prepaid sims are purchased with a one-time SIM fee (often included). These plans include unlimited Canadian talk/text and can be bought with an eSIM option. Bell: Bell’s prepaid (formerly Virgin) plans are similar but with slightly more data: for example 5 GB for C$30, 25 GB for C$40, 50 GB for C$50, and 75 GB for C$60. (Bell often lets you add an extra 25 GB if you recharge on AutoPay.) Like Telus, Bell prepaid allows only LTE speeds, no 5G on prepaid.. Rogers (and Fido): Rogers’ prepaid plans historically cost more for less data: about 2.5 GB for C$40, 4.5 GB for C$45, or 8 GB for C$55. Many travelers find Rogers prepaid less attractive due to these high per-GB rates. (Note: Bell and Rogers merged networks recently, so check any carrier updates.) Virgin+ Canada: Virgin (on Bell’s network) offers bundles like 1 GB for C$35 or 25 GB for C$40 – mirroring Bell, with an added 40 GB plan for C$85 that even includes the USA. eSIM/Travel SIM in Canada: Unlike the UK, you cannot buy a Canadian eSIM at a store (telcos haven’t launched tourist eSIMs in-store). The travel guide strongly recommends using an eSIM or travel SIM instead of local prepaid because local prepaid is expensive. For example, it notes that for $29 USD you could get 25 GB via Bell (around CAD$40), which is “pretty good”, but still overpriced compared to eSIM alternatives. Popular eSIM providers (SimOptions, Airalo, Nomad) offer Canada plans – often around USD$10–30 for 5–20 GB (i.e. roughly CAD$15–45 for similar data). These eSIM plans do support 5G (unlike local prepaid). In short, if you need a Canadian SIM, an eSIM is usually cheaper and more convenient. A local SIM card (if bought at, say, Toronto airport) gives LTE speeds only and often costs over CAD$40 for even small data tiers. eSIM providers, by buying wholesale data, can undercut these prices. For example, Tuque (an Airalo brand) advertises 5G eSIMs for Canada with multi-GB plans. (Voice calls from Canada on an eSIM usually require an add-on or using VoIP apps.) Australia: Telstra, Optus, Vodafone and Beyond Australia’s population is concentrated in cities, but the vast interior means coverage varies. The three main carriers Telstra, Optus, and Vodafone (TPG Telecom) each offer prepaid and eSIM plans. Telstra has the best national coverage (especially if you roam on Boost Mobile or Belong). Telstra Prepaid: Telstra’s prepaid plans are very feature-rich. For example, Telstra sells a 28-day plan with 65 GB of data for A$49, and a 85 GB plan for A$59. They also have higher tiers (110 GB for $69, etc). Telstra frequently runs sales: at the time of writing their 45 GB plan is on sale for $13 instead of $39. All Telstra prepaid plans include unlimited Australian talk/text and bonus data on recharges. (Again, 5G access is included, unlike some other countries’ prepaid.) Telstra also offers $2 SIM kits nationwide. Optus Prepaid: Optus’ plans are slightly cheaper for the same data. Recent offerings include 45 GB for A$39, 65 GB for $49, 85 GB for $59, and 110 GB for $69. An Optus 65 GB plan costs $49 according to a travel blog summary. (Optus adds nice features like data rollover up to 200 GB if you recharge on time.) Optus networks are excellent in cities and towns, though its rural reach isn’t as broad as Telstra’s. Vodafone Australia: Vodafone’s prepaid plans align with Optus’ pricing: 65 GB for $49, 85 GB for $59, etc. Vodafone highlights perks like a 30-day satisfaction guarantee and device security. Its coverage is improving but still trails Telstra’s. MVNOs: There are many lower-cost providers (Amaysim, Kogan, Boost, etc) using these networks. For example, Boost Mobile (on Telstra) often matches Telstra’s plans at a discount. These can offer good value, but brands change their deals frequently. eSIM/Travel SIM in Australia: Australia is eSIM-friendly. All three majors support eSIM, and there are Aussie-focused eSIMs like aloSIM, Twinkle SIM, Nomad, etc. aloSIM, for instance, sells a 20 GB eSIM for $40. International eSIM providers (Airalo, Ubigi, Holafly) cover Australia too. Compared to local SIMs, eSIM packages have the advantage of easy digital delivery, and many include bonus global data or virtual calling numbers. Prices are similar: e.g., a 20 GB aloSIM for $40 is on par with Telstra’s local deals (20 GB isn’t a standard local bundle, but 25 GB Telstra went for $35 in past promotions). The table below summarizes example plans in each country for local vs. travel options: Country Local Provider (Example Plan) Data (GB) Price (Local) Travel eSIM (Example) Data Price (Local) USA Verizon Unlimited Prepaid Unlimited (deprioritized after 50) $50 Airalo/Ubigi eSIM (USA data pack) e.g. 10 ~$30 (USD) T-Mobile Unlimited Prepaid Unlimited (50 GB premium) $45 Nomad/Jetpac eSIM (USA) 5–20 $10–$30 (USD) UK EE PayGo (100 GB) 100 £20 Airalo/Ubigi eSIM (UK) e.g. 10 ~£8–£15 Three PayGo (Unlimited) Unlimited £31 Truely/Holafly travel SIM e.g. 20 ~£20 Canada Bell Prepaid 50 C$50 Airalo/Tuque eSIM (Canada) e.g. 10 ~C$15 Telus Prepaid 10 C$55 Nomad/SimOptions eSIM (Canada) e.g. 5–20 C$10–C$30 Australia Telstra 28-day (65 GB) 65 A$49 aloSIM/Twinkle eSIM (AUS data) 20–50 A$20–A$60 Optus 28-day (45 GB) 45 A$39 Airalo/Ubigi eSIM (Australia) e.g. 10–20 A$8–A$15 These sample figures show that local SIM plans tend to offer more data per dollar, but at the cost of dealing with activation/registration. eSIM/travel SIM deals offer flexibility (especially for short trips or multi-country itineraries), often with somewhat higher per-GB cost but easier setup. Conclusion By 2025 the gap between local prepaid plans and traveler eSIM/SIM options has narrowed. Major carriers in the US, UK, Canada, and Australia now all provide competitive prepaid plans tailored to modern data-hungry users, typically with 30-day validity. At the same time, eSIM providers have matured: most global eSIMs cover these countries and offer quick, worry-free setup via apps or QR codes. For a single-country trip, a local prepaid SIM is usually cheaper per gigabyte. For example, in the UK you can get 100 GB for ~£20, whereas a 10 GB eSIM might cost a similar amount. However, local SIMs may lack EU roaming (UK networks) or 5G on prepaid (Canada), and you must find a shop. For multi-country or convenience, eSIM/travel SIM wins. If your journey spans borders (e.g. UK+Europe, Canada+US), an eSIM with regional coverage can save you from new SIMs in each country. Similarly, if you have an eSIM-capable phone, buying data online before arrival means instant connectivity on touchdown. Many travelers nowadays preload an eSIM for global data (often with data sharing or bonuses) and skip the local phone store altogether. In any case, always compare the latest offers before traveling. The plans and promotions above are accurate as of mid-2025; carriers may run short-term deals (e.g. summer promo bundles). Whether you go local or global, understanding each country’s landscape — networks, coverage, and pricing in USD/GBP/CAD/AUD — is key. Armed with this guide and a quick comparison of current deals, you can pick the most cost-effective and hassle-free way to keep your phone online during your trip. References and Sources AT&T – Prepaid Plans (official pricing). T-Mobile – US Prepaid Plans. Verizon – Prepaid Plans. Traveltomtom – Best Prepaid UK SIM Card 2025 Traveltomtom – Tourist SIM Canada 2025 Calilio – Top Australia SIM Cards for 2025 Techradar – eSIM Providers for International Travel Cloudwards – 7 Best eSIMs for International Travel

Admin

100 Views

How to Activate eSIM on Pixel 3 and Pixel 3a (Step-by-Step Guide)
The embedded SIM (eSIM) is a modern feature that lets you activate a cellular plan without a physical SIM card. It’s essentially a digital SIM built into your phone, programmable by software. With an eSIM, you can switch carriers or add plans right from your Pixel’s settings – no tiny SIM card to insert or lose. This is great for travellers or anyone who wants dual SIM convenience. For example, T-Mobile notes that because an eSIM is built-in, “you wouldn’t have to go purchase a new SIM card if you wanted to swap phones or wireless carriers”. In short, eSIMs bring flexibility and ease to mobile connectivity. Google’s Pixel 3 series – which includes Pixel 3, Pixel 3 XL (2018) and Pixel 3a, Pixel 3a XL (2019) – all ship with eSIM hardware built in. The Pixel 3 models launched with Android 9 (Pie) and later updates; the Pixel 3a series is similar but with midrange specs. All these models support eSIM in principle, though actual support depends on carrier locks and region. (For instance, Pixel 3 units locked to certain carriers or sold in Australia, Japan, etc. may have eSIM disabled.) Notably, the Pixel 3a series introduced Dual SIM Dual Standby (DSDS) – meaning you can use a physical SIM and an eSIM at the same time – whereas the original Pixel 3/3XL can only use one SIM at a time. Here’s a quick overview of the Pixel 3 family and eSIM compatibility: Google Pixel 3/3XL (2018): Flagship phones with Snapdragon 845, launched on Android 9. Both models include eSIM support (if unlocked/eligible), but do not support using physical SIM and eSIM simultaneously. Google Pixel 3a/3a XL (2019): Mid-range phones with Snapdragon 670, also running Android 9+. They support eSIM (unless sold by Verizon or in Japan) and do allow dual-SIM use (one eSIM + one nano-SIM active at once). eSIM Compatibility: All Pixel 3 and 3a models are eSIM-ready. However, carrier restrictions apply: for example, Pixel 3a units bought from Verizon or in Japan won’t activate an eSIM, and Pixel 3 units from many US/Canada carriers (other than Sprint or Google Fi) also lack eSIM. Always check your exact model’s status with the carrier. Dual SIM (DSDS): Pixel 3a (and 3aXL) can run two numbers – one on a physical SIM, one on eSIM – simultaneously. The Pixel 3/3XL can have both an eSIM and a physical SIM, but only one can be active at a time. By understanding these devices and their eSIM support, you can know what to expect before activating your eSIM plan. Pixel 3 vs Pixel 3a: Which Has Better eSIM Support? Since the Pixel 3 and Pixel 3a series have different hardware and release dates, their eSIM support has some differences. Here’s a comparison: Feature Pixel 3 / 3XL (2018) Pixel 3a / 3aXL (2019) eSIM Compatibility Yes – on unlocked phones or those originally on Google Fi/Sprint. Carrier-locked units (e.g. from AT&T or Verizon) or units sold in Australia/Taiwan/Japan do not support eSIM. Yes – on unlocked phones. Verizon-branded Pixel 3a (and Japanese models) have eSIM disabled. Other carriers generally work. Dual SIM (DSDS) No – only one SIM (eSIM or physical) can be active at once. Yes – supports Dual SIM Dual Standby (one physical SIM + one eSIM active). Launch OS Android 9 (Pie) out of the box. Android 9 (Pie) out of the box. Typical Price Premium flagship price when new. Lower mid-range price; slightly cheaper at launch. From this, we see that Pixel 3a models generally have fewer restrictions on eSIM (only Verizon/Japan exceptions) and add DSDS support. The original Pixel 3 works with eSIM on unlocked or Fi/Sprint versions, but lacks simultaneous dual-SIM. In practice, if you need two lines, the Pixel 3a is better. For raw performance, Pixel 3 is faster (Snapdragon 845 vs 670), but that’s a separate issue. Pixel 3 eSIM vs Physical SIM on Pixel 3 Series Pixel 3-series phones can use either a physical nano-SIM or an eSIM (or both on the 3a models). Here’s how to decide which to use: Dual SIM Use: Only the Pixel 3a/3aXL allow both a physical SIM and an eSIM at once. If you insert a nano-SIM into a Pixel 3a alongside an eSIM, both can stay active (one line on each). For Pixel 3/3XL, you can have an eSIM plus a nano-SIM installed, but only one works at a time – you must manually switch which SIM is active in settings. eSIM Pros: Using the eSIM frees up the physical tray and lets you manage carrier plans digitally. For example, you could keep your main number on eSIM and use a temporary plan (or a data-only plan) on the physical SIM. It’s also convenient for travel: instead of buying a new local SIM, you can just scan a local eSIM QR code. As T-Mobile explains, eSIM means you don’t need to buy new SIM cards to swap carriers. eSIM Cons: eSIM requires carrier support and an internet connection to activate. Some carriers (notably Verizon or certain international carriers) don’t allow eSIM on Pixel 3-series phones. If you lose or reset your phone, reactivating the eSIM profile usually means getting a new QR code from your carrier. Physical SIM Pros: The traditional nano-SIM works in all Pixel 3/3a phones regardless of these eSIM restrictions, as long as it’s unlocked or on the original carrier. It’s easy to swap between phones if you have the SIM. It also works without needing Wi-Fi or data to insert/activate. Physical SIM Cons: You can’t use it simultaneously with another SIM on Pixel 3 (only on 3a). Also, you have to physically swap it if you want a different carrier, which can be less convenient when traveling. When to Use Which: If your Pixel 3 is unlocked and your carrier supports eSIM, using an eSIM is often simpler for adding a second number or travel data (just scan the QR code on the spot). If your Pixel is carrier-locked or from a carrier that doesn’t allow eSIM (like many AT&T/Verizon Pixel 3 models), you’ll need to use a physical SIM. If you need truly simultaneous dual lines, use a Pixel 3a/3aXL: put one number on the eSIM and one on a physical SIM. Otherwise, choose whichever your carrier provides: some carriers may require starting with a physical SIM (e.g. to verify your account) and then allow converting to eSIM. Summary: For Pixel 3a owners, eSIM + physical SIM can both be used together. For Pixel 3 owners, you’ll typically use either eSIM or a physical SIM, but not both at once. eSIM offers flexibility (no card needed), while physical SIM is the reliable fallback. What You Need Before Activating eSIM Before you begin, make sure you have everything in place for a smooth eSIM setup: Unlocked or Eligible Phone: Your Pixel 3/3a must be carrier-unlocked or originally on a supported carrier. Carrier-locked Pixels (e.g. from AT&T or Verizon in the US, or some international variants) often have eSIM disabled. If you have a locked phone, you may need to contact the carrier for an unlock. Updated Android Version: It’s best to update your Pixel to the latest Android version available (Android 10, 11, or above). Some carriers (like Bell in Canada) even specify Android 10+ is required for eSIM. At minimum, Android 9 (Pie) ships with eSIM support, but updates can improve stability. Internet Connection: Ensure the Pixel is connected to Wi-Fi (or has mobile data from an existing SIM) during setup. eSIM profiles download over the network. In particular, a stable Wi-Fi is recommended to avoid activation errors. Carrier QR Code or Activation Code: You’ll need the eSIM details from your carrier or eSIM provider. This usually comes as a QR code (and/or manual codes) that you scan with your phone. Make sure you have that code on hand. Screen Lock Set Up: Android requires your device to have a secure lock screen (PIN, password, etc.) before adding an eSIM. If you haven’t set one up yet, do so in Settings > Security. Carrier Support Confirmation: Double-check that your carrier supports eSIM on Pixel 3-series. For example, Google notes Pixel 3a phones from Verizon (US) or Japan, or Pixel 3 phones from most US/Canada carriers (except Google Fi/Sprint) are not compatible with eSIM. Backup (Optional): As with any major change, it’s wise to back up important data. Adding an eSIM shouldn’t erase anything, but if you’re also resetting or switching phones, a backup can be helpful. With these ready (unlocked device, internet, QR code, etc.), you’re set to add the eSIM profile. How to Activate eSIM on Pixel 3 (Step-by-Step) Once you have the QR code or activation information, follow these steps on your Pixel 3 or 3a to load the eSIM: Open Settings on your Pixel 3/3a. Tap Network & Internet. Tap SIMs (on some phones it may say “Mobile network” or “SIM cards”). Tap Add SIM (it may appear as a + sign or “Download a SIM”). Select Set up an eSIM. This opens the eSIM activation screen. Scan the QR code provided by your carrier. Point your camera at the code. If your camera won’t scan, you can usually tap a “Need help?” or manual-entry option and enter the SM-DP+ address and activation code from your carrier. After scanning, your Pixel will download the eSIM profile. Follow any on-screen prompts (like naming the SIM or setting it as primary). Once installation completes, confirm your mobile data or calls are working. Check that the network name (e.g. your carrier) shows up and that you have signal bars. You may also see a notification that a new SIM has been added. If prompted, assign the eSIM to calls/data (for dual-SIM usage). Go to Settings > Network & Internet > SIMs, then select which SIM (physical or eSIM) to use for mobile data or phone calls. Google’s official guide suggests that at step 5, you’ll see “Set up an eSIM”. The Pixel’s built-in QR reader will handle the code. It’s usually straightforward – just tap “Download” when the code is recognized. After that, test your connection by opening a web page or making a call. If it works, your Pixel’s eSIM is active! Transferring eSIM to Your New Pixel 3/3a If you already have an eSIM active on an old device and want to move it to a new Pixel 3 or Pixel 3a, you have two main options: During Setup (Data Transfer): When first powering on the new Pixel, you’ll go through the usual Android setup. If you choose to transfer data from your old phone (via cable or Wi-Fi), the system can also migrate your SIM. The prompt will ask which SIM to transfer; choose your eSIM and tap Transfer. The phones need to be on Android 12 or later and have screen locks enabled for automatic transfer. From Settings (after setup): If you’ve already set up the new Pixel without migrating the eSIM, you can do it manually. On the new Pixel, go to Settings > Network & Internet > SIMs > Add SIM > Transfer SIM from another device. This will initiate a transfer process. (Ensure your old phone stays powered on and nearby, connected to Wi-Fi.) Contact Your Carrier: If transfer isn’t working or you no longer have the old device, you can get a new eSIM activation from your carrier. They can issue a fresh QR code to scan into your Pixel. After initiating the transfer or scanning a new QR code, wait for the new Pixel to activate the eSIM. If it stalls, try restarting the phone or toggling Airplane Mode. Once complete, your new Pixel should have the eSIM profile active, and your old device’s eSIM will typically deactivate automatically. For detailed steps, Google’s guide suggests going to Settings > Network & Internet > SIMs > Add SIM > Transfer SIM from another device, exactly as above. Follow the on-screen prompts to finish the transfer. Top eSIM Carriers & Providers (US, UK, Canada, Australia) Here’s a rundown of the main carriers and eSIM services that work with the Pixel 3 series in the target countries: United States: Google Fi – Google’s own MVNO fully supports eSIM on Pixels (including Pixel 3/3a). You can activate Fi via eSIM easily. T-Mobile – Offers eSIM plans on unlocked Pixels. Many of T-Mobile’s prepaid brands (Mint Mobile, Metro by T-Mobile, etc.) also support eSIM. AT&T – Traditionally slower with eSIM, but unlocked Pixel 3s can use AT&T’s eSIM service. (AT&T requires starting with a physical SIM first, then converting.) Verizon – Not supported on Pixel 3/3a. Verizon-branded Pixel 3 phones do not allow eSIM, and Pixel 3a on Verizon is likewise blocked. (If you have an unlocked Pixel 3/3a, you may use other carriers.) Online eSIM Providers – Services like Airalo, Ubigi, RedteaGO, etc., sell international data eSIMs that work on any unlocked Pixel. These can be handy for travel anywhere. United Kingdom: Major carriers (EE, Vodafone, O2, Three) all support eSIM on Pixel devices. EE’s own help pages explicitly note that “all Google Pixel devices from Pixel 3 and onwards” can use an EE eSIM. O2, Vodafone, and Three have similar support. Prepaid/virtual operators (e.g. giffgaff, Sky Mobile) often use the main networks, so eSIM tends to be available. MVNOs – Many UK MVNOs (like Tesco Mobile, ID Mobile, etc.) on these networks now offer eSIM plans too. Canada: The big three (Bell, Telus, Rogers) and their brands (Virgin, Fido, Koodo, etc.) support eSIM. For example, Bell’s documentation explicitly lists “Google Pixel 3 series or later” as eSIM-compatible, confirming Pixel 3/3a work. Telus and Rogers also advertise eSIM support on modern Pixel phones. You’ll usually need Android 10+ to activate. Smaller carriers – Freedom Mobile (on Rogers network) and other carriers generally follow suit. If in doubt, check with the carrier’s BYOD eSIM support page. Australia: Telstra, Optus, and Vodafone AU all offer eSIM services. You can purchase eSIM plans for data or bring-your-own-device eSIM activation for Pixel 3/3a if unlocked. Note, however, that some Australia-sold Pixel 3 units had eSIM disabled by the carrier (Telstra). If you buy an unlocked Pixel 3 or Pixel 3a, you should be able to add an Australian eSIM. Local eSIM sellers – Australia also has eSIM data providers (like Amaysim, Lebara eSIM), which work on any unlocked Pixel. Global eSIM Providers: In addition to national carriers, there are global eSIM companies like Airalo, eSIM.net, SimOptions, Nomad, etc. They sell prepaid data-only eSIMs for dozens of countries. These work on Pixel phones as long as the device supports eSIM (which Pixel 3/3a do) and are great for travel. In summary, if you live in the US, UK, Canada or Australia, all the major networks in those countries support Pixel 3-series eSIM in some form. Just be sure to use an unlocked phone or the carrier’s eligible version, and you can typically pick or add a plan via eSIM. Troubleshooting Common Pixel 3 eSIM Issues Even with everything in place, you may encounter hiccups activating or using eSIM. Here are fixes for common problems: eSIM Option Not Showing: If “Add eSIM” or “Download a SIM” isn’t visible in Settings, it often means your Pixel’s eSIM functionality is disabled by the carrier. (For example, Pixel 3 from AT&T/Verizon or Japan won’t show an eSIM option.) Ensure your phone is unlocked and on a supported carrier. Also, check that your Pixel is updated to the latest Android version – older software might hide the eSIM feature. QR Code Won’t Scan: Make sure the QR code is clear and the lighting is good. Remove any smudges from the camera. If scanning fails, look for a “Need help?” or “Enter code manually” link on the eSIM screen. You can then manually input the SM-DP+ address and activation code provided by your carrier. eSIM Stuck on “Activating…“: If the profile seems stuck, try these steps: toggle Airplane Mode on/off, or reboot the phone and try again. Verify you have an Internet connection. According to Pixel troubleshooting guides, you should also verify the new eSIM is turned ON in Settings > Network > SIMs, and set as the active data SIM. If it’s off or not selected, your Pixel won’t connect. No Mobile Data After Activation: If calls/texts work but data doesn’t, check the APN settings. Your carrier should supply APN details; on Pixel go to Settings > Network > Mobile network > APN and enter them. After saving, tap your mobile plan and choose “Enable” or “On” for data. Also ensure Wi-Fi is off or out of range, so you’re testing on cellular. Switching SIMs Doesn’t Work: Remember, on Pixel 3 the phone won’t actively run both SIMs. Go to Settings > Network & Internet > SIMs and manually select which SIM you want to use for phone/data. On Pixel 3a with DSDS, you can assign eSIM for one task and physical SIM for another. Error Messages During Setup: If you see errors like “This code is no longer valid” or “Cannot add eSIM”, the best fix is to contact your carrier. They may need to reset or reissue your eSIM profile. Before calling, ensure you’ve tried rebooting and that your phone is unlocked. Physical SIM Interference: Occasionally, having a faulty physical SIM in the tray can confuse the phone. Try removing the physical SIM card (if any) and then set up the eSIM alone. You can reinsert the physical SIM later if needed. If you’ve verified device compatibility (unlocked, right region) and still have issues, consider seeking help from the Pixel community or your carrier’s support. Many problems boil down to one of the above fixes – wrong OS version, locked phone, or needing to manually enable the downloaded eSIM profile. Frequently Asked Questions Q: Does the Pixel 3 support eSIM?A: Yes – the Google Pixel 3 and 3XL have built-in eSIM capability. However, only unlocked units or those from Google Fi/Sprint will activate it. A Pixel 3 bought from most US/Canada carriers (AT&T, Verizon, etc.) or sold in Australia/Japan will not allow eSIM activation. Q: Is the Pixel 3a eSIM compatible?A: Yes, the Pixel 3a and 3aXL support eSIM as well. The exception is Pixel 3a phones sold by Verizon (US) or in Japan – those specific models have eSIM disabled. Unlocked Pixel 3a units work with eSIM on supported networks. Q: Can I use a physical SIM and eSIM at the same time on Pixel 3?A: Pixel 3/3XL: No. They can only use one SIM at a time. If you have both installed, you must choose which one is active.Pixel 3a/3aXL: Yes. These models support Dual SIM Dual Standby, letting you run one number on a physical SIM and another on the eSIM simultaneously. Q: What Android version do I need for eSIM?A: Pixel 3/3a came with Android 9, which has eSIM support. For best results, update to Android 10 or later. (Some carrier guides explicitly require Android 10+ for Pixel eSIM to work.) Q: How do I add or switch SIMs on my Pixel 3?A: Go to Settings > Network & internet > SIMs. From there you can add a new SIM (physical or eSIM) and toggle which one is used for calls or data. On Pixel 3a with two SIMs, you’ll see options to assign each SIM. On Pixel 3, you select one active SIM at a time. Q: How do I remove an eSIM?A: In Settings > Network & internet > SIMs, tap the eSIM profile and choose “Delete” or “Remove SIM.” This deletes the eSIM from your phone but does not cancel your carrier plan (you’ll need to contact the carrier to end service). Q: Can I convert my physical SIM to an eSIM?A: Many carriers allow converting a physical SIM plan to an eSIM through their app or customer service. If so, first have them issue an eSIM profile. After installing it and confirming it works, you can remove the physical SIM. Q: What if I lose my Pixel 3 with an active eSIM?A: Report the loss to your carrier immediately. They can remotely cancel the eSIM profile if needed. Then order a replacement eSIM and scan the new QR code on your new phone. If you have more questions, consult the Pixel help forums or your carrier’s support resources. Conclusion The Google Pixel 3 and 3a series are fully capable of using eSIMs, opening up convenient dual-SIM and easy carrier-switching options. Just remember that support depends on your model’s origin and carrier – an unlocked Pixel 3 or 3a will almost certainly work with eSIM, while some carrier-locked versions won’t. Once your phone is set up, activating an eSIM is a matter of scanning a QR code in Settings. With both Pixel 3 and 3a, eSIM technology means you can add a second line, use international data plans, or quickly switch providers without swapping cards. The Pixel 3a’s extra dual-SIM ability makes it especially handy for managing two networks at once. We hope this guide helped you understand how to activate eSIM on your Pixel 3/3a. If you found it useful, please share it with fellow Pixel owners or leave a comment. Enjoy the freedom of eSIM on your Pixel! References and Sources Google Pixel Phone Help: Get a SIM & add it to your Pixel phone. T-Mobile Blog: What is eSIM?. Google Pixel Phone Help: Set up a new eSIM. Google Pixel Phone Help: Transfer a SIM to a new phone. Holafly: Is the Google Pixel 3 eSIM Compatible?. Bell (Canada) Support: What are eSIM-compatible devices?. EE (UK) Help: Using an eSIM with a Google Pixel. MobiMatter Knowledge Base: [GOOGLE PIXEL] Troubleshoot eSIM connection issues.

Admin

197 Views

How to activate eSIM on iPhone 13 Mini, iPhone 13, iPhone 13 Pro and iPhone 13 Pro Max
The iPhone 13 series revolutionized mobile connectivity by introducing advanced eSIM capabilities across all models. Whether you own an iPhone 13 Mini, iPhone 13, iPhone 13 Pro, or iPhone 13 Pro Max, you can take advantage of this cutting-edge technology to enjoy seamless dual-SIM functionality and enhanced mobile flexibility. This comprehensive guide will walk you through everything you need to know about activating and using eSIM on your iPhone 13 series device, from understanding the basics to troubleshooting common issues. What is eSIM Technology? An eSIM (embedded SIM) is a digital SIM card that's built directly into your smartphone's hardware. Unlike traditional physical SIM cards that you insert into a tray, eSIMs are programmed electronically, allowing you to activate cellular service without handling physical components. Key benefits of eSIM technology include: Instant activation: No waiting for physical SIM cards to arrive Multiple profiles: Store several carrier profiles simultaneously Travel convenience: Switch between local and international plans easily Space efficiency: Eliminates the need for physical SIM slots Enhanced security: Harder to remove or tamper with compared to physical SIMs Is iPhone 13 eSIM Compatible? All iPhone 13 series models support eSIM technology, making them versatile devices for modern connectivity needs. Here's a detailed breakdown: Model eSIM Support Dual SIM Configuration Storage Capacity Display Size iPhone 13 Mini Yes Physical nano-SIM + eSIM Up to 8 eSIM profiles 5.4 inches iPhone 13 Yes Physical nano-SIM + eSIM Up to 8 eSIM profiles 6.1 inches iPhone 13 Pro Yes Physical nano-SIM + eSIM Up to 8 eSIM profiles 6.1 inches iPhone 13 Pro Max Yes Physical nano-SIM + eSIM Up to 8 eSIM profiles 6.7 inches Important considerations: All models can store up to 8 eSIM profiles but can only have 2 active simultaneously One physical SIM and one eSIM can be active at the same time Regional availability may vary (some models in China mainland don't support eSIM) Requires iOS 12.1 or later for full eSIM functionality iPhone 13 Pro eSIM vs iPhone 13 Pro Max eSIM: Which is better? When it comes to eSIM functionality, both the iPhone 13 Pro and iPhone 13 Pro Max offer identical capabilities, but there are subtle differences in user experience and carrier optimization. Both models share identical eSIM features including the same activation process and requirements, compatibility with all major carriers offering eSIM services, dual SIM functionality that allows both to run physical SIM and eSIM simultaneously, and profile storage capacity for 8 eSIM profiles with 2 active lines. Where They Differ iPhone 13 Pro Max advantages include better battery life when managing two active SIM profiles, enhanced antenna design that provides slightly better reception in low-signal areas, and a larger display that makes navigation through eSIM settings and carrier apps easier. iPhone 13 Pro advantages center around being more portable, making it better for frequent travelers who switch eSIM profiles regularly, and offering one-handed operation that makes managing eSIM settings on the go more convenient. Both models work exceptionally well with major carriers including T-Mobile for seamless eSIM activation with 5G support, AT&T for quick setup process with comprehensive coverage, Verizon for reliable connectivity with advanced network features, and international carriers offering excellent compatibility with global eSIM providers. Both models require iOS 12.1 or later for optimal eSIM performance, with iOS 16 or later recommended for the latest features. iPhone 13 eSIM vs Physical SIM Understanding when to use eSIM versus physical SIM can significantly impact your mobile experience. The iPhone 13 series supports both options, and you can even use them simultaneously through Dual SIM Dual Standby (DSDS) functionality. Advantages of eSIM Convenience factors of eSIM include instant activation that allows you to set up new service in minutes without visiting a store, no physical handling which eliminates the risk of losing or damaging SIM cards, multiple profiles for storing several carrier profiles for different purposes, and travel flexibility that enables switching to local carriers when traveling internationally. Security benefits encompass tamper-resistant technology that cannot be physically removed by unauthorized users, remote management capabilities that allow carriers to update settings without physical access, and device theft protection since it's harder for thieves to disable tracking by removing the SIM. Advantages of Physical SIM Practical benefits of physical SIM include universal compatibility that works with any device that accepts nano-SIM, easy device switching by simply moving the SIM between phones, serving as a backup option to keep as secondary line when primary eSIM fails, and carrier flexibility since some carriers may not support eSIM yet. Dual SIM Configuration Options The iPhone 13 series supports2 major dual SIM setup options: Option 1: Physical SIM + eSIM (Recommended) This configuration uses your primary line on physical SIM for reliability while maintaining your secondary line on eSIM for flexibility, with both lines active simultaneously. Option 2: Dual eSIM (iPhone 14 and later) Note that iPhone 13 series requires at least one physical SIM slot, though this setup provides future-proofing for carrier evolution. Best Use Cases You should choose eSIM when frequently traveling internationally, needing temporary additional lines, wanting instant carrier switching, or preferring an all-digital setup. Choose Physical SIM when frequently switching between devices, when your carrier doesn't support eSIM, when you need maximum compatibility, or when you prefer traditional setup methods. Use both options when you need separate work and personal lines, want domestic and international plans active simultaneously, or desire backup connectivity options. Activation Requirements for iPhone 13 eSIM Before activating eSIM on your iPhone 13 series device, ensure you meet all necessary requirements to guarantee a smooth setup process. Essential Device Requirements Your device must be carrier-unlocked or locked to the carrier providing eSIM service. If you purchased through a carrier, contact them to confirm unlock status, while factory unlocked devices from Apple have no restrictions. For iOS version requirements, you need a minimum of iOS 12.1 for basic eSIM functionality, though iOS 16 or later is recommended for optimal performance and latest features. Update through Settings > General > Software Update. Additionally, ensure you have at least 1GB of available storage for carrier profiles and updates, maintain a stable Wi-Fi or cellular data connection for activation, and backup your device before making changes. Carrier-Specific Requirements From your eSIM carrier, you'll need a QR code which is the most common activation method provided by carriers, or manual entry details as an alternative activation option if QR codes aren't available. You'll also need account verification with a valid account from the carrier offering eSIM service and plan compatibility to ensure your chosen plan supports eSIM activation. For documentation, have valid identification matching your carrier account, account PIN or password for verification, and previous device information if you're transferring existing service. Network Compatibility Check Your iPhone 13 supports GSM/LTE networks across all models, offers 5G compatibility where available, and includes VoLTE support for voice calls over data. For regional considerations, verify eSIM availability in your country or region, as some carriers may have limited eSIM plan options and international roaming capabilities may vary. Pre-Activation Checklist Before starting the activation process: Confirm device is unlocked or compatible with chosen carrier Update to latest iOS version Ensure stable internet connection Have eSIM QR code or activation details ready Backup device data Remove any existing eSIM profiles if switching carriers Verify carrier account is in good standing Check available storage space Ensure physical SIM (if using dual SIM) is properly inserted iPhone 13 eSIM Activation - Step-by-Step Guide The eSIM activation procedure might slight differ based on the method of activation. Below are 3 popular methods of activating eSIM on iPhone 13 series. Follow this comprehensive guide to activate eSIM on your iPhone 13 Mini, iPhone 13, iPhone 13 Pro, or iPhone 13 Pro Max. Method 1: eSIM Activation via QR Code (Most Common) Step 1: Access Cellular Settings Open the Settings app on your iPhone 13, tap "Cellular" or "Mobile Data" depending on your region, then select "Add Cellular Plan." Step 2: Scan QR Code Position your iPhone to scan the QR code provided by your carrier. Ensure the code is well-lit and clearly visible, then wait for automatic detection and processing. Step 3: Verify Carrier Information Review the carrier name and plan details displayed on your screen. Confirm the information matches your intended service, then tap "Add Cellular Plan" to continue. Step 4: Configure Plan Settings Choose a label for your new line such as "Personal," "Work," or "Travel." Set your default line for cellular data, configure your default line for iMessage and FaceTime, and select your preferred line for voice calls. Step 5: Complete Activation Wait for carrier verification, which usually takes 1-15 minutes. Test cellular connectivity by making a call or using data, then verify both voice and data services are working properly. Method 2: eSIM Activation via Manual Entry When QR codes aren't available, navigate to Settings > Cellular > Add Cellular Plan, then tap "Enter Details Manually" at the bottom of the QR scanner screen. Input the carrier information by entering the SM-DP+ address provided by your carrier, input the activation code or confirmation code, and add any additional authentication details if required. Follow the verification steps by waiting for the carrier system to process your request, complete any additional verification steps as prompted, and confirm activation with your carrier if needed. Method 3: eSIM Activation via Carrier App Many carriers offer in-app eSIM activation. Download your carrier's official app from the App Store, log in with your account credentials, and navigate to the eSIM or device management section. Follow the in-app process by selecting "Add eSIM" or "Activate eSIM" option, follow carrier-specific activation steps, and allow the app to configure cellular settings when prompted. Verify the setup by checking that eSIM appears in Settings > Cellular, test connectivity and features, and configure dual SIM settings if needed. Post-Activation Configuration After successful activation, configure your line preferences by setting the default line for cellular data usage, choosing your preferred line for voice calls, configuring messaging app preferences, and setting up emergency contact accessibility. Test all functions by making test voice calls on both lines if using dual SIM, send and receive text messages, test data connectivity and speeds, and verify visual voicemail functionality. Transferring eSIM to New iPhone 13 When upgrading to a new iPhone 13 series device or replacing your current one, transferring your existing eSIM is straightforward with the right approach. eSIM Quick Transfer (iOS 16+) This is the fastest method for compatible devices. Prepare both devices by ensuring your old iPhone is nearby and powered on, sign in to the same Apple ID on both devices, connect both devices to Wi-Fi, and keep both devices unlocked during the process. Initiate the transfer on your new iPhone by powering it on during setup, select "Transfer from iPhone," choose your old iPhone from the list, and follow the Quick Start process. Transfer the eSIM profile when prompted by selecting "Transfer SIM," choose the eSIM profile you want to transfer, wait for the transfer to complete (usually 5-10 minutes), and test connectivity on the new device. Manual Transfer Process For older iOS versions or when Quick Transfer isn't available, contact your carrier by calling customer service or visiting their website, request eSIM transfer to your new device, provide both device IMEI numbers, and complete identity verification. Deactivate the old eSIM by removing the eSIM profile from your old device through Settings > Cellular > [Plan Name] > Remove Cellular Plan, then confirm removal to prevent conflicts. Activate on your new device by following the standard eSIM activation process, use new QR code or activation details provided by carrier, and complete setup and testing. Important Transfer Considerations Before transferring, backup your old device to ensure all data is safely backed up, note your current settings by documenting current cellular plan configurations, check carrier policies as some carriers may charge for eSIM reactivation, and consider timing by choosing a time when you can afford brief service interruption. After successful transfer, update emergency contacts to ensure 911/emergency services work properly, test all features by verifying voice, text, data, and visual voicemail, configure preferences by setting up dual SIM preferences if applicable, and update carrier apps by downloading and configuring carrier-specific applications. If transfer fails, restart both devices and try again, ensure both devices have strong Wi-Fi connections, contact your carrier for manual activation assistance, and check for iOS updates on both devices. Common transfer problems include old eSIM not deactivating properly, new device not recognizing transfer, partial feature activation, and activation timeout errors. Top eSIM Service Providers for iPhone 13 in US, UK, Canada, and Australia Choosing the right eSIM provider is crucial for optimal performance on your iPhone 13 series device. Here's a comprehensive overview of the best options in each target region. United States eSIM Service Providers: Carrier Features T-Mobile Plans: Magenta, Magenta MAX, Business plans 5G coverage: Extensive nationwide 5G network eSIM activation: Instant through app or website International roaming: Competitive rates in 200+ countries Best for: Heavy data users and international travelers AT&T Plans: Unlimited Premium, Starter, Extra plans Network quality: Strong coverage in rural areas eSIM setup: Quick activation through myAT&T app Business features: Advanced enterprise solutions Best for: Business users and rural coverage needs Verizon Plans: Play More, Do More, Get More Unlimited Network reliability: Consistently rated top for reliability eSIM support: Seamless activation process 5G Ultra Wideband: Premium high-speed network access Best for: Users prioritizing network reliability MVNO Options Google Fi: Flexible pricing, excellent international coverage Mint Mobile: Budget-friendly prepaid plans Visible: Unlimited data on Verizon network at lower cost United Kingdom eSIM Service Providers: Carrier Features EE (Everything Everywhere) Coverage: Best 5G coverage across UK Plans: Smart, All Round, Full Works plans eSIM activation: Quick setup through MyEE app International: Strong European roaming options Best for: 5G performance and urban coverage O2 Network: Comprehensive 4G/5G coverage Plans: Rolling, 12-month, and SIM-only deals eSIM support: Easy activation through My O2 app Priority: O2 Priority rewards and experiences Best for: Entertainment and rewards seekers Three USP: True unlimited data plans International: Go Roam in 70+ destinations eSIM setup: Streamlined online activation 5G: Expanding 5G network coverage Best for: Heavy data users and travellers Vodafone UK Network: Strong rural and urban coverage Plans: Flexible SIM-only and contract options eSIM activation: Through My Vodafone app Business solutions: Comprehensive enterprise offerings Best for: Business users and rural coverage Canada eSIM Service Providers: Carrier Features Rogers Coverage: Extensive nationwide coverage 5G network: Advanced 5G+ technology eSIM support: Quick activation through MyRogers app Plans: Infinite and Share Everything options Best for: Comprehensive Canadian coverage Bell Network quality: Strong performance across Canada Plans: Unlimited and shared data options eSIM activation: Through MyBell app or online Business services: Advanced enterprise solutions Best for: Business users and premium features Telus Coverage: Excellent western Canada coverage Health focus: Unique health and wellness features eSIM setup: Easy activation through MyTELUS app 5G: Expanding 5G network infrastructure Best for: Health-conscious users and western Canada Flanker Brands Fido (Rogers): Budget-friendly options with good coverage Virgin Plus (Bell): Competitive pricing with Bell network Koodo (Telus): Flexible plans with no-contract options Australia eSIM Service Providers: Carrier Features Telstra Coverage: Best nationwide coverage, especially rural 5G network: Most extensive 5G coverage in Australia eSIM support: Quick activation through My Telstra app Plans: Upfront and postpaid options Best for: Rural users and maximum coverage needs Optus Network: Strong urban coverage and competitive pricing Entertainment: Included streaming services eSIM activation: Easy setup through My Optus app International: Good roaming options Best for: Urban users and entertainment lovers Vodafone Australia Plans: Competitive unlimited options Network: Solid urban and suburban coverage eSIM setup: Through My Vodafone app Value: Often best pricing for unlimited data Best for: Budget-conscious urban users International eSIM Service Providers - Travel eSIMs: Carrier Feature Airalo Coverage: 200+ countries and regions Plans: Country-specific and regional packages Activation: Instant through mobile app Pricing: Competitive rates for international travel Best for: Frequent international travellers Holafly Specialization: Tourist-focused travel eSIMs Coverage: 160+ destinations worldwide Features: Unlimited data in many countries Support: 24/7 customer assistance Best for: Tourism and leisure travel GigSky Focus: Business and premium travel Coverage: 190+ countries Network quality: Premium carrier partnerships Plans: Flexible day, week, and month options Best for: Business travellers and premium users Troubleshooting Common iPhone 13 eSIM Issues Even with advanced technology, eSIM activation and usage can sometimes encounter issues. Here are the most common problems and their solutions. eSIM Not Activating When experiencing symptoms like activation process starting but not completing, error messages during QR code scanning, or carrier verification failing, try these solutions. Check your network connectivity by ensuring you have a strong Wi-Fi or cellular connection, try switching between Wi-Fi and cellular data, and restart your router if using Wi-Fi. Verify carrier compatibility by confirming your carrier supports eSIM for iPhone 13, check if your account is eligible for eSIM activation, and ensure you have the correct QR code or activation details. Reset network settings by going to Settings > General > Transfer or Reset iPhone > Reset > Reset Network Settings. This removes all Wi-Fi passwords and cellular settings, so you'll need to reconfigure network connections and try activation again. Update iOS by checking for iOS updates in Settings > General > Software Update, install any available updates before attempting activation, and restart your device after update completion. eSIM Option Not Visible in Settings If you're experiencing symptoms like "Add Cellular Plan" option missing from Settings, cellular menu not showing eSIM options, or inability to find eSIM settings anywhere, start by checking device compatibility. Verify your iPhone 13 model supports eSIM in your region, as some models sold in certain countries may have eSIM disabled. Contact Apple Support to confirm device specifications. Try updating your carrier profile by going to Settings > General > About, wait 30 seconds for carrier settings update prompt, and install any available carrier updates. If issues persist, reset all settings by going to Settings > General > Transfer or Reset iPhone > Reset > Reset All Settings. This preserves data but resets all system preferences, so you'll need to reconfigure settings and check for eSIM options. Dual SIM Not Working Properly When only one SIM works at a time, you cannot make calls on secondary line, or data switching between SIMs inconsistently, configure your default settings properly. Go to Settings > Cellular, set default line for cellular data, configure default line for voice calls, and assign specific lines to contacts. Check line labels by ensuring each SIM has a distinct label through Settings > Cellular > [Plan Name] > Cellular Plan Label, choosing clear, descriptive names. Sometimes a simple restart helps - power off your iPhone completely, wait 30 seconds, power on and test both lines. Poor eSIM Signal or Data Speeds If you're experiencing weak signal strength on eSIM line, slow data speeds compared to physical SIM, or frequent call drops and failed connections, check carrier coverage by verifying carrier coverage in your area, compare coverage maps with your location, and consider switching to a different carrier profile. Reset cellular settings by going to Settings > General > Transfer or Reset iPhone > Reset > Reset Network Settings, reconfigure cellular settings from scratch, and test signal strength after reset. Contact carrier support to report signal issues, request network optimization for your area, and ask about alternative network settings. eSIM Profile Management Issues When you cannot delete old eSIM profiles, experience errors when switching between profiles, or profiles show as active but don't work, remove problematic profiles by going to Settings > Cellular > [Plan Name], tap "Remove Cellular Plan," confirm removal and restart device. Clear profile storage if maximum profiles are reached by removing unused ones, since each iPhone 13 can store up to 8 profiles. Keep only actively used profiles and contact your carrier for reactivation by requesting new activation credentials, deactivating problematic profiles completely, and starting a fresh activation process. Emergency Services Not Working If you cannot reach emergency services, location services aren't working during emergency calls, or you're uncertain about which line will be used for emergency calls, configure emergency settings by going to Settings > Emergency SOS, ensure location services are enabled, and set up emergency contacts properly. Test emergency functionality using non-emergency numbers to test calling, verify location services are working, and confirm both SIM lines can place calls. Understand emergency call routing as emergency calls typically use the line with strongest signal, both physical and eSIM can handle emergency calls, and the system automatically selects the best available connection. General Troubleshooting Tips Before contacting support, document error messages and symptoms, note when issues started occurring, and try basic troubleshooting steps first. Contact Apple Support for hardware-related eSIM issues, iOS software problems affecting eSIM, or device replacement and repair needs. Contact carrier support for account or billing issues, network coverage problems, or carrier-specific feature problems. Frequently Asked Questions General eSIM Questions Can I use eSIM and physical SIM simultaneously on iPhone 13? Yes, all iPhone 13 models support dual SIM functionality with one physical nano-SIM and one eSIM active simultaneously. This allows you to have two phone numbers and plans on the same device. How many eSIM profiles can I store on iPhone 13? iPhone 13 series devices can store up to 8 eSIM profiles, but only one eSIM and one physical SIM can be active at the same time. You can switch between stored profiles as needed. Do I need to unlock my iPhone 13 to use eSIM? Your iPhone 13 must be either carrier-unlocked or locked to the carrier providing the eSIM service. If your device is locked to a different carrier, you'll need to unlock it first. Can I use eSIM for international travel? Absolutely! eSIM is excellent for international travel. You can activate local carrier plans or use international eSIM providers like Airalo, Holafly, or GigSky without changing physical SIM cards. Activation and Setup Questions How long does eSIM activation take? eSIM activation typically takes 5-15 minutes, depending on your carrier. Some carriers offer instant activation, while others may require up to an hour for processing. What if I don't have a QR code for eSIM activation? You can activate eSIM manually by entering the SM-DP+ address and activation code provided by your carrier. Go to Settings > Cellular > Add Cellular Plan > Enter Details Manually. Can I activate eSIM without Wi-Fi? You need an internet connection for eSIM activation. This can be through Wi-Fi or cellular data from your existing SIM card. A stable connection is essential for successful activation. What happens to my eSIM if I reset my iPhone? A factory reset will remove all eSIM profiles from your device. You'll need to reactivate your eSIM service after the reset using new activation codes from your carrier. Carrier and Compatibility Questions Do all carriers support eSIM on iPhone 13? Most major carriers worldwide support eSIM, but availability varies by region and carrier. Check with your specific carrier to confirm eSIM support and compatible plans. Can I transfer my physical SIM to eSIM on the same carrier? Yes, most carriers allow you to convert your physical SIM service to eSIM. Contact your carrier's customer service or use their mobile app to request the conversion. Are there additional costs for using eSIM? Most carriers don't charge extra for eSIM functionality itself, but some may have fees for activation, reactivation, or multiple eSIM changes. Check your carrier's fee schedule. Can I use the same eSIM profile on multiple devices? No, each eSIM profile is tied to a specific device. You cannot use the same eSIM profile simultaneously on multiple devices. You'll need separate activations for each device. Technical and Troubleshooting Questions Why can't I see the eSIM option in my iPhone 13 settings? This could be due to several factors: your device might be from a region where eSIM is disabled, you might need a carrier settings update, or your iOS version might be outdated. Try updating iOS and carrier settings first. Can I remove an eSIM profile without contacting my carrier? You can remove eSIM profiles from your device through Settings > Cellular > [Plan Name] > Remove Cellular Plan. However, you should contact your carrier to properly cancel service and avoid billing issues. What's the difference between eSIM and physical SIM performance? In terms of call quality, data speeds, and network performance, there's no difference between eSIM and physical SIM. Both use the same cellular technology and network infrastructure. Can I backup and restore eSIM profiles? eSIM profiles are not included in regular iPhone backups. When you restore your device or switch to a new iPhone, you'll need to reactivate your eSIM service with new credentials from your carrier. Advanced Usage Questions How do I switch my default data line between SIMs? Go to Settings > Cellular > Cellular Data, then select which line you want to use for cellular data. You can change this anytime, and the setting affects which line is used for internet connectivity. Can I use different carriers for my physical SIM and eSIM? Yes, you can use different carriers for each SIM. This is popular for separating work and personal lines or using a local carrier while traveling internationally. How do I know which line will be used for emergency calls? Your iPhone automatically uses the line with the strongest signal for emergency calls. If both lines have equal signal strength, it will use your default voice line. Emergency services can reach you on either number. Can I set up call forwarding between my eSIM and physical SIM? Call forwarding between lines depends on your carriers' capabilities. Some carriers support cross-network call forwarding, while others only support forwarding within their network. Contact your carriers for specific options. Conclusion The iPhone 13 series represents a significant leap forward in mobile connectivity, with comprehensive eSIM support across all models - the iPhone 13 Mini, iPhone 13, iPhone 13 Pro, and iPhone 13 Pro Max. This technology transforms how we think about mobile service, offering unprecedented flexibility and convenience for personal and professional use. Key Takeaways Universal eSIM Support: Every iPhone 13 model supports eSIM technology, allowing you to store up to 8 carrier profiles and use dual SIM functionality with one physical and one eSIM active simultaneously. Seamless Activation: Whether you choose QR code scanning, manual entry, or carrier app activation, the process is straightforward and typically completes within minutes. Global Flexibility: eSIM technology is particularly valuable for international travelers, business users, and anyone who needs multiple phone lines without carrying multiple devices. Reliable Performance: eSIM technology offers the same network performance, call quality, and data speeds as traditional physical SIM cards, with the added benefits of instant activation and enhanced security. If you're considering making the switch to eSIM on your iPhone 13, start with trusted carriers that have proven eSIM support. Major providers like T-Mobile, AT&T, and Verizon in the US, EE and O2 in the UK, Rogers and Bell in Canada, and Telstra and Optus in Australia all offer reliable eSIM services with comprehensive customer support. For international travel, consider dedicated eSIM providers like Airalo, Holafly, or GigSky, which specialize in travel-friendly plans and instant activation across multiple countries. As eSIM technology continues to evolve, we can expect even more innovative features and broader carrier support. The iPhone 13 series positions you perfectly for this mobile future, ensuring your device remains current with advancing connectivity standards. The convenience of instant carrier switching, the security of embedded SIM technology, and the flexibility of dual SIM functionality make eSIM an compelling choice for modern mobile users. Whether you're managing work and personal lines, traveling internationally, or simply want the latest in mobile technology, your iPhone 13 series device is ready to deliver. Share Your Experience We hope this comprehensive guide has helped you understand and activate eSIM on your iPhone 13 series device. If you found this information valuable, consider sharing it with friends and family who might benefit from learning about eSIM technology. Have you successfully activated eSIM on your iPhone 13? Share your experience and any additional tips in the comments below. Your insights can help other users navigate their eSIM journey more effectively. For the latest updates on eSIM technology and iPhone features, bookmark this guide and check back regularly as we continue to update it with new information and carrier developments. References and Sources AT&T eSIM Activation Guide About eSIM on iPhone - Apple Support eSIMs for international travel - Airalo Set up cellular service on iPhone – Apple Support (UK)

Admin

91 Views

How to Activate eSIM on iPhone 12 Series in US, UK, Canada and Australia
eSIM (embedded SIM) is a digital SIM technology built into your device, eliminating the need for a physical SIM card. It lets you store multiple cellular plans simultaneously, switch carriers digitally (no store visits), use dual lines (e.g., work + personal) on one device, save space for larger batteries/advanced components, and do much more. Is iPhone 12 eSIM Compatible? Yes, all iPhone 12 models support eSIM. However, some regional restrictions may apply - as tabulated below: Model Supported? Exceptions iPhone 12 Mini Yes Not supported in mainland China; supported in Hong Kong/Macao iPhone 12 Yes Not supported in mainland China iPhone 12 Pro Yes Not supported in mainland China iPhone 12 Pro Max Yes Not supported in mainland China Key Specs: Dual SIM Support: All models support Dual SIM Dual Standby (DSDS) via one nano-SIM + one eSIM (or two eSIMs) . Regional Note: Models bought in mainland China use dual nano-SIMs instead of eSIM . iPhone 12 Mini vs. iPhone 12 Pro Max: eSIM Efficiency Comparison All iPhone 12 variants share identical eSIM hardware and functionality. Differences arise in carrier support and regional availability: Carrier Compatibility: Works seamlessly with major carriers like T-Mobile (US), EE (UK), Telstra (AU), and Rogers (CA) . Android Version Requirement: N/A (iOS 14+ supports eSIM activation) . Hong Kong/Macao Exception: Only the iPhone 12 Mini supports eSIM there; other models use dual nano-SIMs . Physical SIM or eSIM: Which should you use? The decision to use one over the other is often influenced by multiple factor. The table below presents 4 of these determining factors. Factor eSIM Pros Physical SIM Pros Convenience No swaps; add plans via QR code Easily transfer between phones Travel Add local data plans instantly Buy local SIMs cheaply Security Can’t be stolen or cloned No reliance on software Multi-Line Use 8+ stored plans Limited to 1–2 slots When to Use eSIM: Frequent travelers (instant global data) Dual-line users (business + personal) Avoiding SIM-swap fraud When to Use Physical SIM: In regions with poor eSIM carrier support When switching phones frequently Dual SIM Use Case: Set your physical SIM for calls/texts and eSIM for data while traveling . What You Need Before Activating eSIM Unlocked iPhone: Check via Settings > General > About > Carrier Lock. Must show "No SIM restrictions" . Wi-Fi/Cellular Connection: Required for activation . eSIM QR Code/Details: From your carrier (e.g., T-Mobile, Vodafone). iOS 14+: Update via Settings > General > Software Update. IMEI Check: Dial *#06# to confirm EID (eSIM ID) appears . How to Activate eSIM (Step-by-Step) Method 1: QR Code (Most Common) Go to Settings > Cellular. Tap Add Cellular Plan. Scan the QR code provided by your carrier. Tap Continue and label the plan (e.g., "Work"). Set as default for data/calls if needed . Method 2: Manual Entry Go to Settings > Cellular > Add Cellular Plan. Tap Enter Details Manually. Input SM-DP+ Address and Activation Code (from carrier). Follow prompts to complete setup . Method 3: Carrier App (e.g., T-Mobile) Download your carrier’s app. Follow in-app eSIM activation steps . Tip: Enable Data Roaming in Settings > Cellular > [eSIM Plan] when traveling! Transferring eSIM to a New iPhone 12 Both iPhones on iOS 16+: On the new iPhone: Settings > Cellular > Add eSIM > Transfer From Nearby iPhone. On the old iPhone: Confirm transfer . From Android/Non-Apple Device: Contact your carrier to reissue the eSIM via QR code . Top eSIM Providers for iPhone 12 in US, UK, CA, AU Country Carriers Travel eSIM Providers US T-Mobile, Verizon Nomad, Saily, Holafly UK EE, Vodafone Airalo, Sim Local Canada Rogers, Bell Roamless, Maya Mobile Australia Telstra, Optus Jetpac, Breeze Provider Perks: Saily: Built-in VPN/ad blocker; $19.99/10GB . Nomad: Regional plans (e.g., 10GB for $22); 200+ countries . Holafly: Unlimited data (throttled after 1GB/day) . Troubleshooting eSIM Issues eSIM Not Activating? Restart iPhone → Re-scan QR code . Ensure iOS is updated. "Add Cellular Plan" Missing? Confirm iPhone is unlocked . Check region: Mainland China models don’t support eSIM . No Service After Activation? Toggle Airplane Mode on/off. Reinstall eSIM via Settings > Cellular > [eSIM] > Remove Plan . Frequently Asked Questions Q1: Can I use two eSIMs at once on iPhone 12?A: Yes! iOS 13+ allows two active eSIMs (e.g., "Data + Work") . Q2: Does eSIM drain battery faster?A: No—battery impact is negligible . Q3: Can I convert my physical SIM to eSIM?A: Yes! Go to Settings > Cellular > [SIM] > Convert to eSIM (if carrier supports it) . Q4: Is eSIM secure if I lose my phone?A: Yes—eSIMs can’t be removed, and carriers can remotely disable them . Conclusion The iPhone 12 series fully embraces eSIM technology, offering flexibility for travelers, dual-line users, and security-conscious individuals. While mainland China models lack eSIM, all other variants support nano-SIM + eSIM combinations for seamless global connectivity. Ready to try eSIM? Activate a plan through carriers like T-Mobile or travel providers like Nomad—no SIM tray required! Share this guide with fellow iPhone 12 users, and comment below with your eSIM experiences. References and Sources eSIM Compatible Phones List (2025) Apple Support: About eSIM on iPhone The Best eSIMs for Travelers (2025) Physical SIM vs. eSIM: CNET Comparison MicroEsim: eSIM Compatible Devices eSIM.sm: iPhone Setup Guide Runaway Traveller: eSIM Provider Reviews Nomad: eSIM vs. Physical SIM Guide eSIMFOX: iPhone 12 eSIM Compatibility Apple: Set Up Cellular Service

Admin

80 Views

How to Activate eSIM on iPhone 11, iPhone 11 Pro and iPhone 11 Pro Max
Modern iPhones offer eSIM capability – a digital SIM embedded in the device – alongside (or instead of) a physical nano‑SIM. An eSIM lets you activate a cellular plan without needing a removable SIM card, providing flexibility like keeping a home line and a data line at once or easily adding a local plan while traveling. The iPhone 11 series (iPhone 11, 11 Pro, and 11 Pro Max) all support Dual SIM: one physical nano‑SIM and one eSIM. These models were released in 2019 with Apple’s A13 Bionic chip, running iOS 13 out of box. They all have Dual SIM (nano‑SIM + eSIM) support. (Note: iPhones sold in mainland China omit eSIM support and use two physical SIM slots instead, but in the US, UK, Canada, and Australia, the iPhone 11, 11 Pro, and 11 Pro Max use one nano‑SIM + one eSIM.) The standard iPhone 11 has a 6.1-inch LCD screen, while the 11 Pro/Max have 5.8″/6.5″ OLED screens, but all three models share the same eSIM hardware and software support. In short, if you have any iPhone 11-series device, it is already eSIM-compatible: you only need the proper carrier setup and iOS version (iOS 12.1+ required, with iOS 17 recommended for latest features). By avoiding a physical SIM card, eSIMs save space and allow quick carrier switching. For example, Apple notes that eSIM “enables you to switch between SIMs effortlessly” and manage multiple plans digitally. This is ideal for travel or running separate work and personal lines on one phone. As of late 2024 (with iOS 17), the iPhone 11 series can manage up to eight eSIMs (though only one can be active with the physical SIM at a time). iPhone 11 vs. 11 Pro vs. 11 Pro Max: eSIM Compatibility Comparison All three models – iPhone 11, iPhone 11 Pro, and iPhone 11 Pro Max – offer the same eSIM functionality. Each supports one nano‑SIM card + one eSIM (Dual SIM Dual Standby). There is no special “better” eSIM support in one variant over the others. Whether you have an iPhone 11 or 11 Pro/Pro Max, the device requirements and capabilities for eSIM are identical: you need a carrier and plan that support eSIM, and your phone should be running an up-to-date iOS (iOS 12.1 or later). Carrier support: In practice, any carrier that supports eSIM on iPhones will work on any of the 11 series. For example, major US carriers (AT&T, T-Mobile, Verizon and most MVNOs) support eSIM on these phones. Google Fi supports iPhone 11 (with iOS 13+) via its app and trial, and smaller carriers like Mint Mobile or Visible can also be used via eSIM if unlocked. OS requirements: The iPhone 11 series shipped with iOS 13, and Apple’s official guidance is that eSIM requires at least iOS 12.1 on an XS/XR or later iPhone. In other words, keep your iPhone updated to the latest iOS version (iOS 17 or newer) to ensure the best eSIM experience. Unlocked vs Locked: If your iPhone is carrier-locked, you can only activate eSIM plans from that same carrier. An unlocked iPhone 11 lets you use eSIM plans from any supported provider. (For example, to use Google Fi on an iPhone 11, the phone must be unlocked, and as Google states, iPhone XR/XS/11 and later can use Fi eSIMs with iOS 13+.) In summary, the iPhone 11, 11 Pro, and 11 Pro Max all equally support dual SIM (nano + eSIM) without any hardware differences. Choose the model based on screen size or performance needs – the eSIM side is the same for all. Some older resources mention “Android 9+ needed for eSIM” in error; ignore that for iPhones. The key is simply to have an iPhone 11-series with current iOS and a compatible carrier. eSIM vs. Physical SIM on iPhone 11 Series Using an eSIM on your iPhone 11 instead of (or alongside) the physical SIM has distinct advantages and some trade-offs. Here’s how they compare on these devices: Aspect Physical SIM eSIM Form factor Removable nano‑SIM card you insert in tray Digital SIM embedded in the phone Setup Insert SIM card. No need for internet. Scan a QR code or install from carrier app (Wi-Fi required initially). Carrier switching Swap SIM cards or get new SIM for new plan. Download a new eSIM or switch carriers in Settings; no physical swap. Dual SIM use Only one physical SIM. eSIM must be used separately. iPhone 11 supports dual SIM: one physical + one eSIM active simultaneously (DSDS). Two active eSIMs only work on iPhone 13+. Travel convenience Need to buy a local SIM (physical) or roam. Easily buy local eSIM online; keep home number too. Number of SIMs Only 1 per tray. Additional SIM requires second slot or eSIM. Can store multiple eSIMs (up to ~8); only one active at a time with physical SIM. Easily toggle plans. Security If phone lost, thief has SIM to use. eSIM can’t be removed without wiping the phone (more secure). Activation speed Wait for SIM delivery or store visit. Instant activation (scan code or install) – often faster. Reusability Can move SIM to another device easily. To move eSIM, you typically need to deactivate on old and reactivate on new (transfer procedure). As shown, eSIM offers flexibility – for example, you could keep your main number on the physical SIM and download a local eSIM data plan for travel, or maintain separate work and personal lines. Apple notes that you can “keep two SIMs active at the same time” on dual-SIM iPhones, meaning one number can use voice while the other uses data, etc. In practice, if you’re switching carriers often or need a temporary line, eSIM is very convenient. However, a physical SIM has the simplicity of plug-and-play and doesn’t require an internet connection to install. If you want to move an existing service from one phone to another without support for transfer, a physical SIM can simply be pulled out. On the other hand, eSIM is ideal if you want no plastic card, want to reduce clutter, or plan to use two lines simultaneously without needing a second device. What You Need Before Activating eSIM Before setting up an eSIM on your iPhone 11 series device, make sure you have everything ready: Compatible iPhone & iOS: Your device must be one that supports eSIM (iPhone 11, 11 Pro, 11 Pro Max qualify). Update to the latest iOS version available (iOS 17 or later). iOS 12.1+ is the minimum for eSIM, but newer iOS ensures smoother setup and features. Carrier Support: Verify that your carrier (or the carrier you plan to use) supports eSIM on the iPhone. Apple publishes lists showing, for example, that US carriers like AT&T, T-Mobile and Verizon support eSIM, UK carriers EE/O2/Vodafone do, Canadian carriers (Bell, Rogers, Telus, etc.) do, and Australian carriers (Optus, Telstra, Vodafone) do. If in doubt, check your carrier’s eSIM policies – many providers allow eSIM activation for current postpaid or prepaid plans. Unlocked Device (if switching carriers): If your iPhone is locked to one carrier, you can only add eSIM plans from that carrier. To use an eSIM from a different provider (e.g. swapping from your home carrier to a travel eSIM), the iPhone must be unlocked. Internet Connection: You need an active internet connection (Wi‑Fi or cellular) on the iPhone during the eSIM setup. This is needed to download the eSIM profile after scanning a QR code or using a carrier app. eSIM Activation Details: Have the details from your carrier ready. This could be a QR code (printed or on another screen), an activation code, or instructions to use a carrier app. Some carriers allow activation via their app (e.g. Verizon’s My Verizon app) or by logging into your account. If using a QR code, ensure it’s provided by the carrier specifically for your line. SIM Tray (if dual SIM): Keep your physical SIM in place if you want to use dual SIM. The iPhone 11 series can use one eSIM and one physical SIM at the same time, so you don’t have to remove your existing SIM unless needed. Backup/ Plan B: It’s wise to note your IMEI or EID (Settings > General > About) and account info beforehand, in case troubleshooting is needed. If you have important phone service on the eSIM being replaced, ensure that number remains active or is transferred properly. By ensuring your device is unlocked (if needed), updated, and that you have the carrier’s QR code or app ready, the activation process will go smoothly. Now you’re set to add the eSIM plan. How to Activate eSIM (Step-by-Step) Activating an eSIM on iPhone 11/Pro/Max is straightforward. Here’s a typical step-by-step process (iOS 17+): Connect to Internet: Make sure your iPhone has Wi-Fi or cellular data connectivity (this allows the phone to retrieve the eSIM plan after scanning). Open Settings: Go to Settings > Cellular (or Mobile Data in some regions). The eSIM options are here. Add Cellular Plan: Tap “Add eSIM” or “Set Up Cellular”. On some iOS versions it may say “Add Cellular Plan.” Scan QR Code (or choose other method): If you have a QR code from your carrier, tap “Use QR Code”. Point your iPhone’s camera at the QR code until it captures it. If you were given an activation code or details instead, you can also choose “Enter Details Manually”. Alternatively, if your carrier provides a setup through an app or SMS, you may be prompted to use that. For example, some carriers let you open their app and install the eSIM automatically. Follow On-Screen Prompts: After scanning or entering details, the phone will fetch the eSIM profile. You might be asked to label the plan (e.g. “Primary” or “Travel”) or confirm any settings. Continue through any activation prompts. Verify Activation: Once done, you should see the new plan listed under Settings > Cellular. Ensure the toggle for the new line is On. You can verify service by checking that you have a carrier name or 4G/5G icon in the status bar for the new plan. Set Default Lines (if dual SIM): If you also have a physical SIM, you can label which line is for voice/data, and assign defaults (e.g. Primary and Secondary) in Settings. For iPhone 11, you can use one line for calls/data and one on standby. That’s it! The eSIM should now be active on your iPhone. You can test it by making a call or using mobile data. If you run into errors (“Unable to complete mobile plan change”, etc.), double-check steps or see the Troubleshooting section below. Transferring an eSIM to a New iPhone 11 Series Device If you already have an eSIM on your old iPhone and got a new iPhone 11/Pro/Max, you can transfer the eSIM without contacting your carrier. Apple’s Quick Transfer feature (iOS 16+) makes this easy: Prepare Both iPhones: Put your old iPhone and new iPhone 11 near each other. Both should be on iOS 16 or later, and connected to power/Wi-Fi. On the New iPhone: During setup or afterward, go to Settings > Cellular > Add eSIM (or “Set Up Cellular”). You’ll see an option “Transfer from Nearby iPhone”. Tap this. On the Old iPhone: A prompt will appear asking to confirm the transfer of your phone number. Follow the on-screen instructions, which typically involve scanning a code or entering a confirmation. Complete Transfer: The eSIM profile will securely transfer to the new iPhone. Once done, your number will be active on the new device. You may be asked to restart. Finalize on New iPhone: After the transfer, go to Settings and ensure the eSIM line is on. You can then assign it as Primary or Secondary line as needed. This method moves the existing eSIM (the carrier plan) to your new iPhone without needing a new QR code. If Quick Transfer isn’t available (for example, if the old iPhone is too old to support it), you can delete the eSIM from the old iPhone and use the carrier’s QR code or app on the new device to reactivate it. Always confirm with your carrier if unsure. Best eSIM Service Providers for iPhone 11 Series in US, UK, Canada, and Australia Many carriers and online services offer eSIM plans for the iPhone 11, 11 Pro, and Pro Max. Below is a country-by-country overview of major options. For detailed pricing and plans, check each provider’s site (prices below are examples). United States: Major carriers like AT&T, Verizon, T-Mobile (and their prepaid brands) support eSIM activation. For instance, T-Mobile Prepaid offers 30-day eSIM plans; their 30-day unlimited talk/text/data starts at about $50. Verizon Prepaid similarly has unlimited eSIM plans for ~$50/month. Google Fi is also compatible with iPhone 11 (iOS 13+), letting you try a 7-day eSIM trial and then a $50/month plan (Unlimited Standard). Example Plans: T-Mobile: 30-day Unlimited – $50. Verizon: Unlimited (w/ AutoPay) – $50. Google Fi Unlimited – $50/month after trial. United Kingdom: The “big four” UK carriers (EE, O2, Vodafone, Three) all support eSIM on iPhone. EE and Vodafone have unlimited 5G SIM-only plans (eSIM available) for around £20–£30/month. O2 likewise offers eSIM options on its data plans. For shorter stays, international eSIM vendors like Airalo, Maya Mobile, or Holafly sell UK or Europe eSIM bundles (e.g. 5GB for a week from ~$10–15). Canada: Most Canadian carriers support eSIM. This includes Bell, Rogers, Telus, Fido, Koodo, and regional providers like Eastlink and SaskTel. For example, Rogers Prepaid has plans like $50 for unlimited 5G data (33GB full speed, then throttled). Telus and Bell have similar unlimited plans (~$75/month). Data-only eSIM packages are also available from services like Maya Mobile (starting ~$10 for 5GB) or Airalo. Australia: Major telcos Telstra, Optus, Vodafone Australia offer eSIM plans. Telstra’s 28-day prepaid eSIM plans include 45GB for $39 or 65GB for $49 (plus higher tiers). Optus and Vodafone have comparable unlimited or high-data eSIM plans. Budget eSIM resellers (like Airalo, Ubigi, Airhub) also sell Aussie data packs; e.g., Ubigi has a 30-day 10GB plan for ~$14, and Airalo sells various AU plans from ~$7 for 3GB. The table below compares a few sample eSIM offerings (plans and prices are illustrative): Provider / Plan Country Data (Allowance) Validity Price (approx.) T-Mobile Prepaid – Unlimited USA Unlimited talk/text/data 30 days $50 Verizon Prepaid – Unlimited USA Unlimited (AutoPay) 30 days $50 Rogers Infinite (eSIM) Canada Unlimited (~75GB) 30 days ~$75 (loyalty/autopay discounts) Telstra Prepaid (28d) Australia 45GB 28 days $39 Telstra Prepaid (28d) Australia 65GB 28 days $49 Ubigi eSIM (10GB) USA 10GB 30 days $14 Airalo (Regional Europe) Europe* 10GB 30 days ~$40 (example package) Some eSIM providers are global/regional (useful if traveling). In each region, also consider MVNOs and smaller providers: e.g., US Mint Mobile, Mint, Visible and US Mobile support eSIM; UK iD Mobile, Sky Mobile; Canada’s Fido, Virgin Mobile, Koodo; Australia’s Amaysim, Boost Mobile. Additionally, apps like Airalo, Ubigi, Airhub sell ready-to-go eSIMs you activate online (they provide a QR code) for flexible data needs, often at competitive rates. Troubleshooting Common eSIM Issues on iPhone 11 Sometimes eSIM activation can hit snags. Here are common problems and quick fixes: “No SIM Installed” or Cannot Scan QR Code: Ensure your iPhone is up to date (latest iOS) and not in China mode (only applies to China models). If the eSIM menu doesn’t even appear, check your device is unlocked and your carrier supports eSIM. Restart the phone and try again. eSIM Not Activating (Error Message): Try toggling Airplane Mode on and off. Go to Settings > Cellular, find the line for the eSIM and toggle it off then on again. Also restart the iPhone. These steps often refresh the radio and fix activation glitches. Unable to Complete “Mobile Plan Change”: This can happen if the eSIM plan was already partially added. Delete any partially added eSIM (Settings > Cellular > [plan] > Delete eSIM) and retry scanning. Make sure you scanned the QR code with the iPhone camera (not a photo) as required. If still blocked, verify your carrier account is in good standing (no unpaid bills) and that the plan is active on their end. Phone Number Isn’t Working after Transfer: If you transferred an eSIM from another phone, ensure you confirmed the transfer on the old phone. Check under Settings > Cellular that the eSIM is turned On. If calls/data still fail, delete and retry the transfer, or contact your carrier to reissue the eSIM QR code. Dual SIM Issues: Remember only one cellular data network can be active at once. If a call is in progress on one line, the other line will show “No Service”. To receive calls on both lines, enable Wi-Fi Calling on one line, or allow Cellular Data Switching (Settings > Cellular). SIM Card Plan Missing: If your physical SIM’s plan doesn’t appear in Settings, eject and reinsert the nano‑SIM tray to ensure it’s seated properly. Carrier Profile Outdated: Go to Settings > General > About. If there’s an update prompt for Carrier Settings, install it. This can resolve eSIM compatibility issues. Still Stuck? Contact your carrier. Apple advises having your IMEI/EID and any error messages ready when calling support. Apple’s official guide also recommends checking that “both cellular plans are set up and ready to use” and that “your iPhone is unlocked or both plans are from the same carrier”. In practice, ensuring your iPhone is unlocked and on a current iOS build will solve most eSIM problems. Frequently Asked Questions Q: Does the iPhone 11 support eSIM?A: Yes. The iPhone 11, 11 Pro, and 11 Pro Max all support one eSIM plus one physical SIM (Dual SIM Dual Standby). Q: How do I activate an eSIM on my iPhone 11?A: Go to Settings > Cellular and tap “Add eSIM”. Then scan the QR code provided by your carrier (or enter details manually) and follow the prompts. Your eSIM should activate within moments. Q: Can I use both an eSIM and a physical SIM at the same time?A: Yes. The iPhone 11 series supports Dual SIM Dual Standby: you can have one active eSIM and one active physical SIM simultaneously. For example, one line could be for data while the other handles calls. Q: How many eSIMs can I store on my iPhone?A: You can store multiple eSIM profiles on the iPhone 11 (up to 8 or more) but only one can be active along with the physical SIM at any time. Apple actually lets you manage eight or more eSIM plans in total. Q: Do I need internet to add an eSIM?A: Yes. Your iPhone must be connected to Wi-Fi or cellular data when scanning the QR code, because it needs to download the eSIM profile online. Q: How do I move my eSIM to a new iPhone 11?A: Use Apple’s eSIM Quick Transfer. On the new iPhone, go to Settings > Cellular > Add eSIM and tap “Transfer from Nearby iPhone.” Follow the on-screen steps on both devices. This securely transfers your line to the new phone. Q: Will activating eSIM erase my physical SIM or data?A: No. Adding an eSIM does not erase your existing physical SIM or its data. It simply adds a second plan. You can toggle each line on or off independently. If needed, you can also delete an eSIM plan later without affecting the other SIM. Q: What if my eSIM won’t activate?A: First, ensure your iPhone is unlocked and up-to-date. Then try toggling Airplane Mode or restarting the phone. In Settings > Cellular, you can also turn off the new eSIM line and turn it back on. If problems persist, check with your carrier for any account issues, or use the Apple support steps. Conclusion The iPhone 11, 11 Pro, and 11 Pro Max all support modern eSIM functionality, making it easy to add or switch cellular plans digitally. By following the steps above, you can quickly activate an eSIM plan – whether for dual-SIM use at home or a travel data plan abroad. Remember to update to the latest iOS and ensure your carrier supports eSIM. With a little preparation (carrier QR code or app, an unlocked phone, internet access), adding an eSIM is as simple as scanning a code. Dual SIM on these iPhones means you enjoy the benefits of both a physical SIM and an eSIM simultaneously. As Apple notes, you can “switch between SIMs effortlessly” with eSIM. If you run into issues, the tips above (toggling airplane mode, reinstalling the plan, etc.) should help. Otherwise, contacting your carrier with your phone’s details ready will usually resolve stubborn problems. Now that you’ve learned how to activate eSIM on the iPhone 11 series, give it a try! Enjoy the flexibility of digital SIMs. If this guide helped, feel free to share it. Happy calling (and data streaming) on your iPhone’s eSIM! References and Sources Apple Support – iPhone 11 Technical Specifications Apple Support – iPhone 11 Pro/Pro Max Tech Specs Apple Support – About eSIM on iPhone Apple Support – Set up Cellular on iPhone Apple Support – Dual SIM with eSIM troubleshooting Apple Support – Troubleshooting eSIM setup Google Fi Help – eSIM Setup on iPhone Apple Community Discussion – Unlock/Same carrier requirement Ubigi – USA 10GB eSIM plan Telstra – Prepaid Mobile eSIM Plans T-Mobile – Prepaid eSIM travel plans Verizon – Prepaid Plans (eSIM compatible) Apple Support – Wireless carriers that support eSIM

Admin

156 Views